By Les Dunn
I went up to Norwich last weekend to brew some beer with Neil, my brewing guru (his brewing guru, in turn, is another Norwich boy, Karl Noonan, who’s won prizes in national competitions for his beers). Here’s how we did it, in 20 steps…
1. Neil ordered some malt (grains of malted barley) from his malt supplier and I brought along a new strain of British hop, called Endeavour, that I’d bought from the brilliant Stocks Farm in Worcestershire.
2. Neil poured 30 litres of water into the brewing vessel and lit the propane burner underneath. This amount of water (with some extra added in step 9) should create 23 litres (about 42 pints) of beer, which is a standard home brew.

3. To do the mash (a process of steeping the malt in hot water to break down the sugars and create the wort), we needed the temperature to be 70°C when we put the mash in, at which point it would drop a bit.
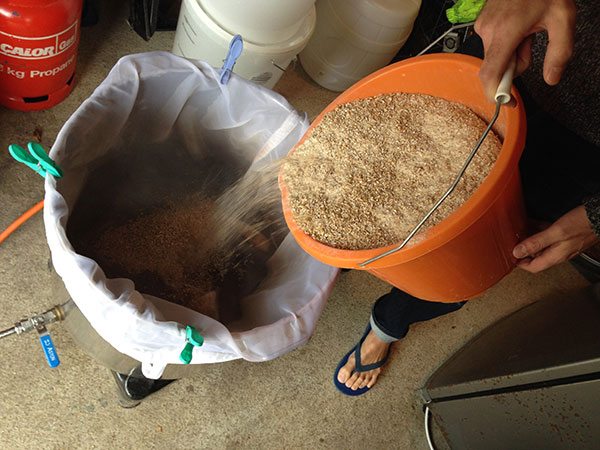
4. We put the nylon mash bag into the brewing vessel (basically a massive stainless steel saucepan with a tap at the bottom, and a copper tube inside that prevents the hops from stopping up the outlet). We were using the brew-in-a-bag (BIAB) method, which originated in Australia in 2009. With this method, you can do your mash and your boil, all in the same vessel. The bag was attached with clothes pegs so it didn’t slip off when we added the grain.
5. With the water at 70°C, we added the grain slowly. Neil had ordered finely crushed grain because that helps compensate for the BIAB method being less efficient than a standard mash, where the malt is directly exposed to the water (the sugars will break down more easily if the grain is more finely crushed). With BIAB, you also use 5-10 per cent more malt than the recipe asks for, to make up for the lower efficiency. So we were using 5.5kg malt (5kg pale base malt and a 500g mixture of darker – ie longer roasted – carapils malt and caramalt).
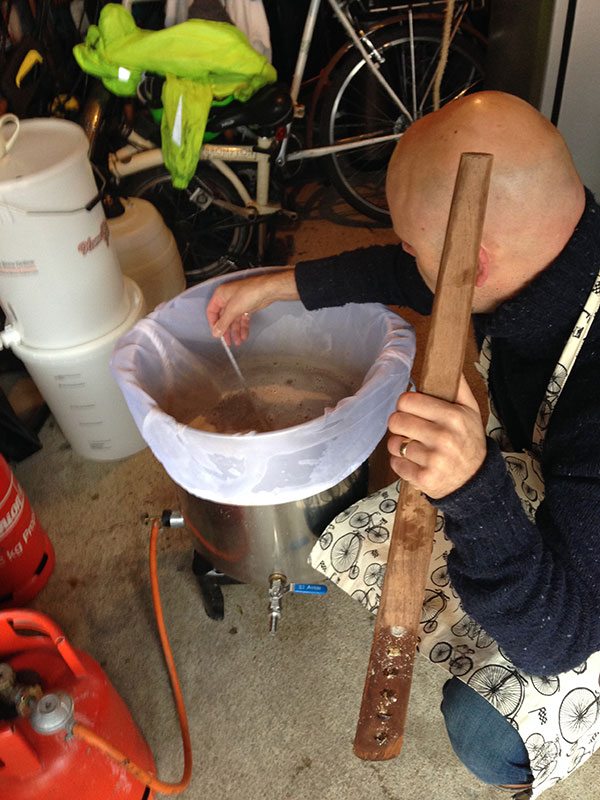
6. Neil’s wife Annie is from Trinidad and on their last trip he bought a huge tropical hardwood roti paddle, then cut some big holes into it to make a mash paddle. Bit like a giant risotto spoon. Nice, innit? He used that to stir the mash while I kept on slowly pouring in the grain to avoid it clumping together (the more separated the grain, the more efficient the mashing process).
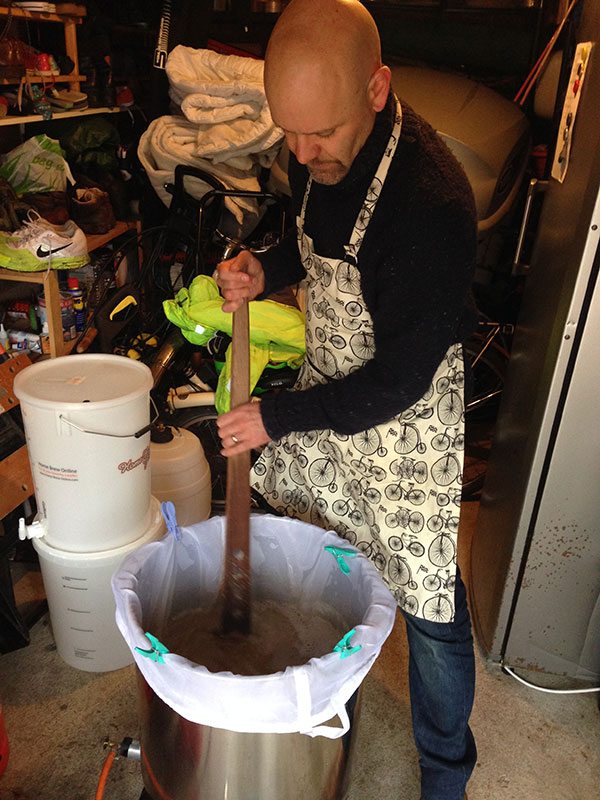
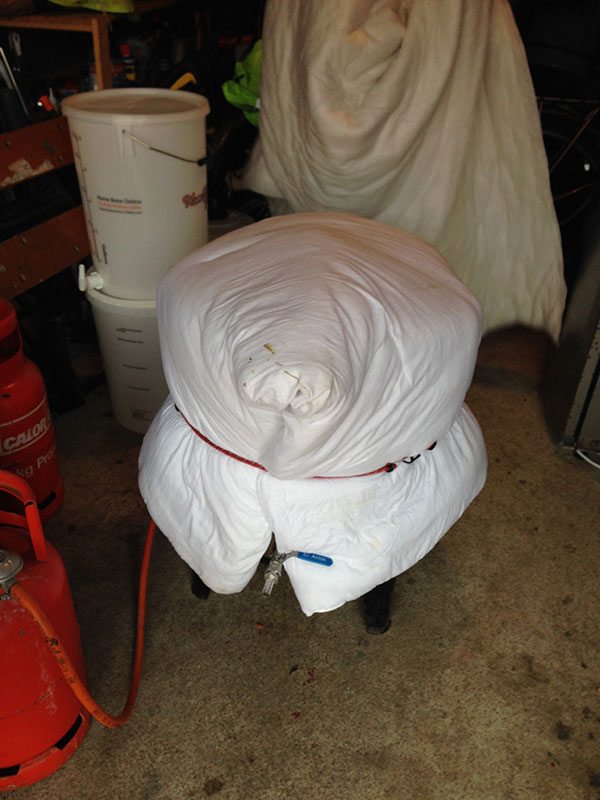
7. Neil took the temperature again. It was only 64°C. We wanted it to be 69°C. The temperature we wanted for mashing was 67°C but the temperature drops a little over the 1½ hour mashing time. We applied more heat until the temperature was up to 70°C, then a final stir, lid on, duvet wrapped around and tied with bungee grips and a second duvet draped on top (to prevent heat loss). We went off for breakfast while the mash did its thing.
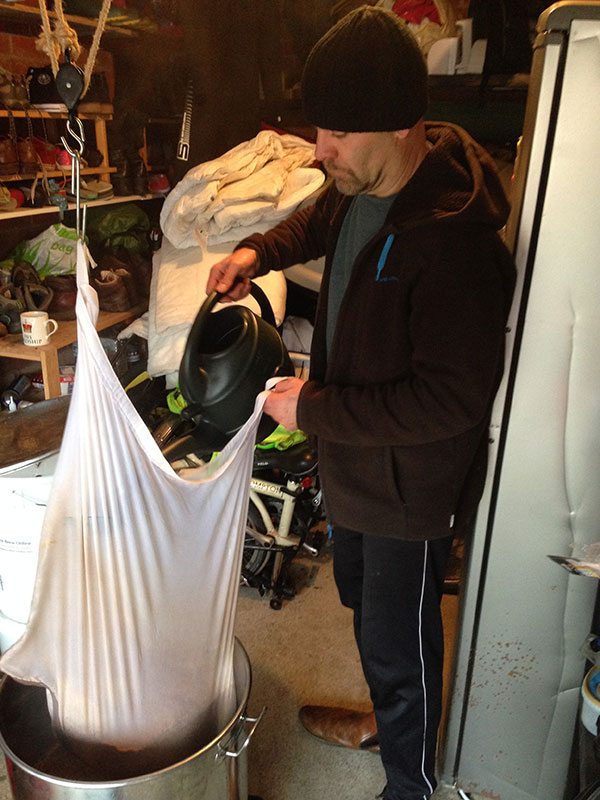
8. After the mashing time had elapsed, we returned to the garage. What we now had was a brown, sweet smelling liquid known as the wort (the same stuff that’s fermented and distilled to make whisky). It was 65°C so the temperature had held up quite well (you can mash between 63-69°C or higher – generally speaking, a lower temperature gives a stronger beer with not much body, while a higher temperature gives a weaker beer with lots of body). Normally Neil would now remove and discard the bag of spent malt and get on with the boil. This time, however, he’d decided to do a bit of sparging. That’s when you rinse the grains to get further sugars off them. You don’t need this step with the BIAB method but Neil’s thinking was, why not? It can’t hurt…
9. We heated the wort to 72C to get more sugar out of it (that’s the classic sparging temperature), then we hoisted up the bag (Neil has set up a simple hoist in his garage, because a bagful of sodden malt is blinking heavy). Normally, Neil would have used 35 litres water at the beginning but, because he was planning to sparge, he only used 30. Now he added 5 litres from the kettle, cooled to 72°C, using a watering can, to wash some more sugar off those malted grains.
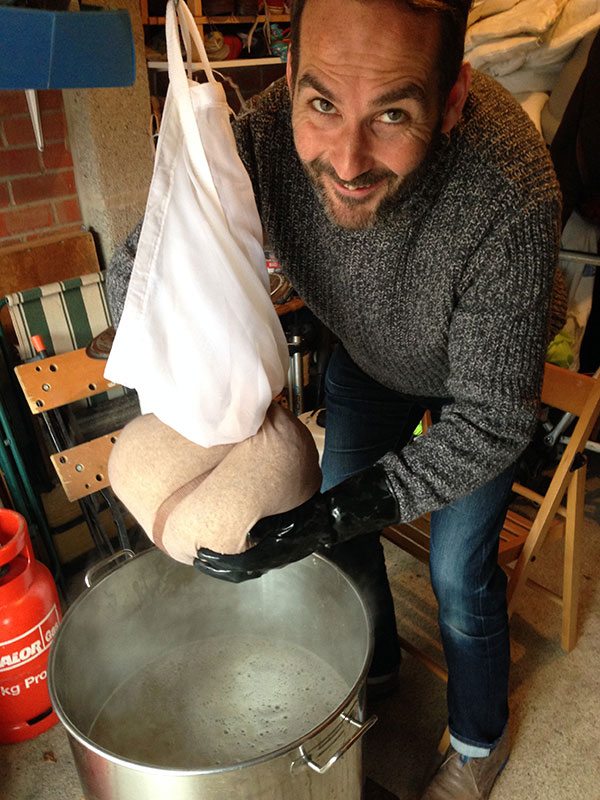
10. It was now time for the big squeeze. Neil put on his scary black rubber gloves and got squeezing dem sugars out of dat malt (like when you squish the teabag on the side of the cup when you’re making a cuppa). The better your squeezing effort here, the better your mash, and Neil’s effort was heroic, from an outsider’s point of view. I had a token squeeze myself, just for blogging purposes.
11. Time for the boil. We took away the bag of spent malt (you can use it as fertiliser, apparently, if you compost it) and cut open our British-grown hops, vac-packed in silver paper for optimum freshness. They smelled fantastic. We were brewing a single hop beer (in which you only use one type of hop) from a recipe in the excellent book Home Brew Beer (Dorling Kindersley). Endeavour is a little-known hop at present because it’s new, developed by Stocks Farm in conjunction with the British Hop Association. It’s a cross-breed with Cascade, a US hop, and has a similar alpha content (hop bitterness) so we followed the book’s single-hop Cascade recipe, more or less.

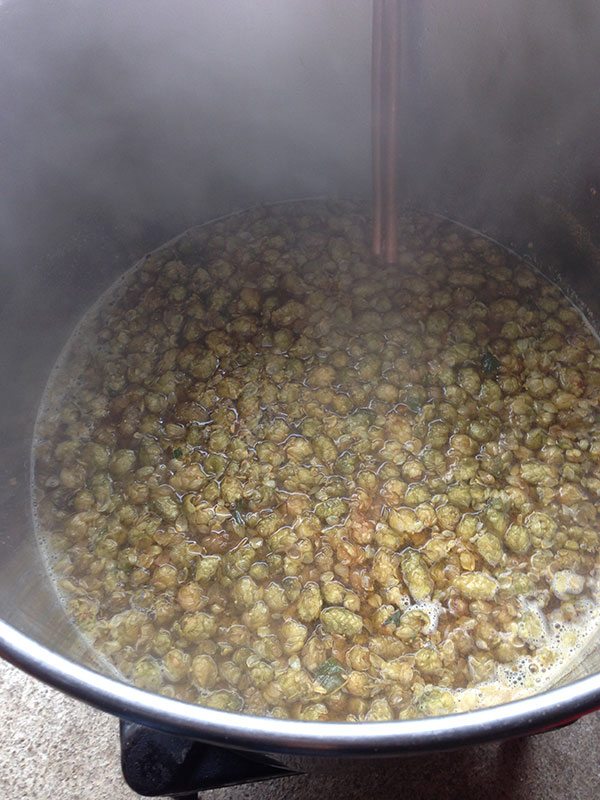
12. The boil has several functions. According to About Food, boiling sterilises the wort, denatures the enzymes that were active in the mash, and stabilises the proteins (this is all good). It’s also during the boil that you add hops, at various stages, first for bittering, then for flavouring and aroma. Hops also help to preserve beer, which is a big reason why they became so popular as a beer-flavouring in the first place. For the first 15 minutes of the 60 minute boil, we put in 35g hops. For the last 15 minutes we added 25g hops and for the final 5 minutes we added another 25g. Then, at flame out (when you turn off the heat), we added another 65g hops. For the last 15 minutes, we also put the copper-coil heat exchanger into the wort to sterilise it (more on that in the next step). For the last 10 minutes, we added Irish moss, a seaweed fining agent, which helps the proteins clot together to clear the wort.
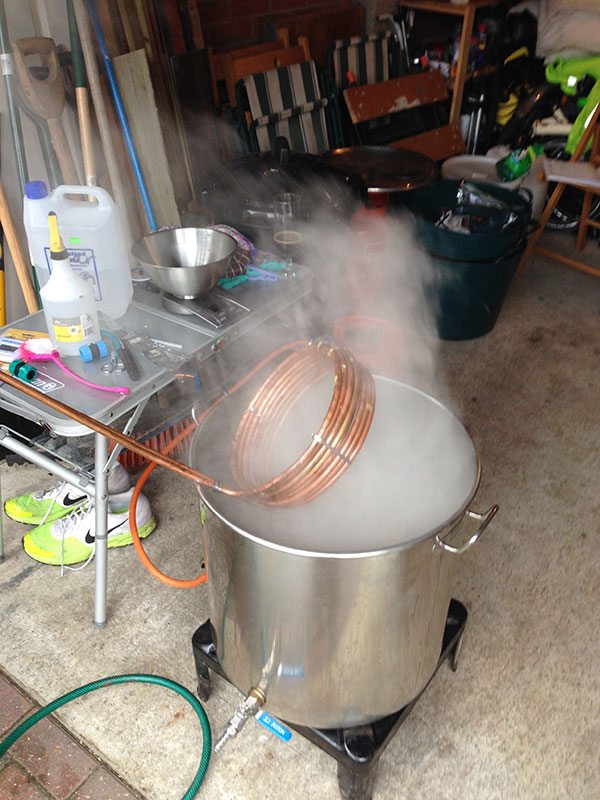
13. The boil was complete. From now on, everything that touched the wort, such as the thermometer, had to be sterile, or it could introduce bacteria that might spoil the beer. That’s where Star San, a no-rinse food-safe sterilising fluid, comes in. In his previous brews, Neil would now reduce the temperature of the brew down to the fermenting temperature (20°C) as quickly as possible using the heat exchanger (cold tapwater from a hosepipe is run through it to cool the wort). However, Carl had told him that if you now let the hops steep for a while at 80°C, you’ll get a better hop flavour. The risk, however, is that you’re leaving the warm wort, which might pick up airborne bacteria.

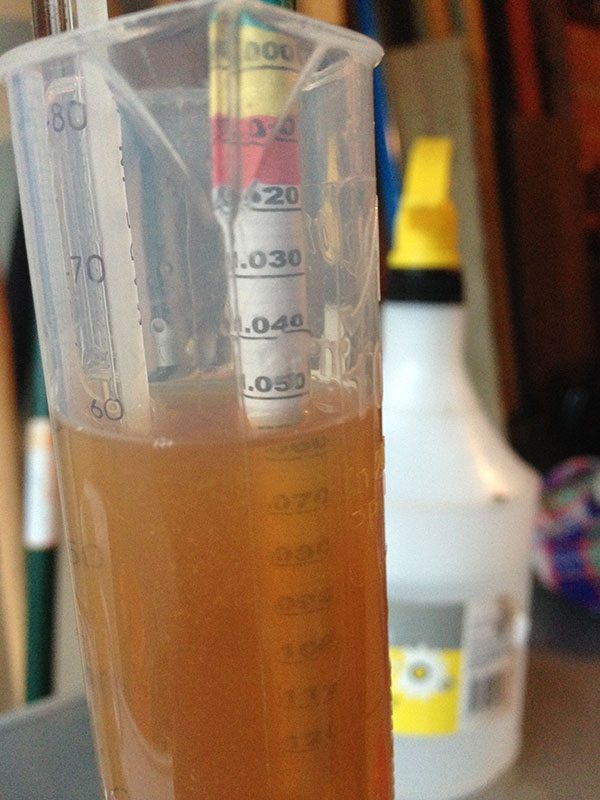
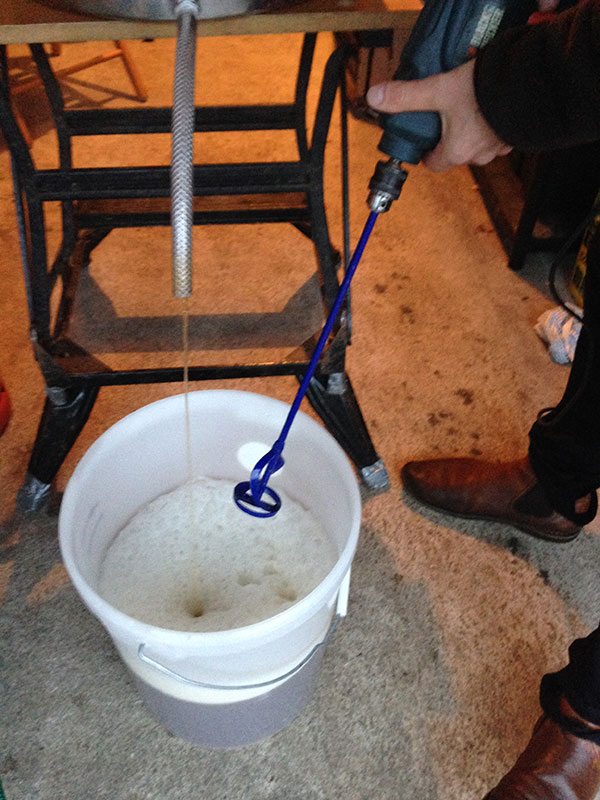
14. Leave it we did, however, while we enjoyed a brew Neil made a few weeks ago, a Mosaic steam beer. And very nice it was, thank you. We also lifted the brewing vessel up onto a table, ready to pour out the wort through the tap, into the fermenting vessel. When we got back to the vessel, the temperature of the wort was around 55°C. We used the heat exchanger to quickly get it down to 20°C. It was now ready to ferment. We took a Star San-sluiced sample of the beer to test its gravity (you put a kind of buoy in a big test tube, then take a reading). The gravity at 20°C was 1054, so Neil reckoned the resulting beer would be about 5% abv. My kinda beer.
15. Now it was time to get the wort into the fermenter. Neil sluiced the fermenter thoroughly with Star San, then placed it on the ground below the brewing vessel and opened the tap. The height of the pour, set to trickle out slowly, aerated the wort. Meanwhile the fattened, rehydrated hops had formed a nice ‘hop bed’ at the bottom of the vessel, which acts as an excellent filter for various nasties.
16. Once the fermenting vessel was half full, Neil attached his Star San-rinsed whisk to his Black & Decker drill and super-frothed the liquid (you have to do this before the fermenter is full because it creates so much froth). A couple of minutes with the macho-whisk and it was super-frothy. That gives the yeast lots of oxygen to work on.
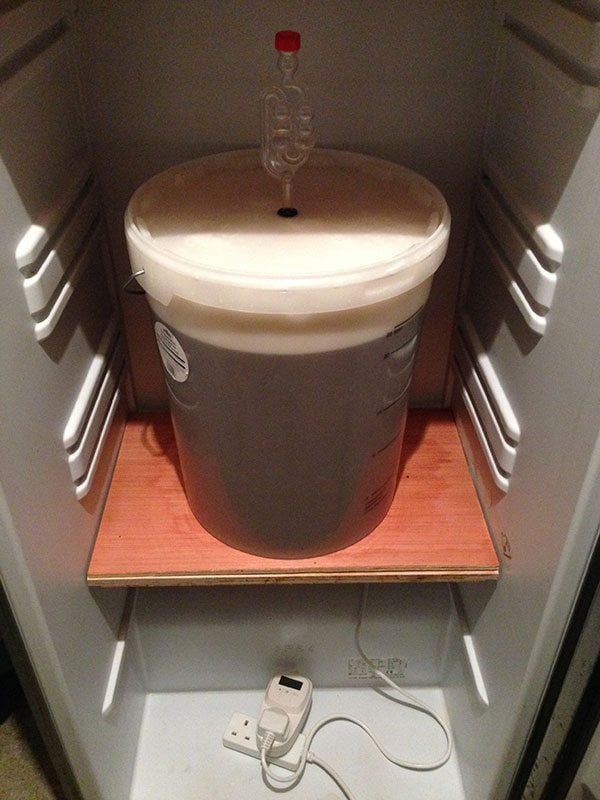
17. With all the wort filtered through the hop bed into the fermenter, Neil added the yeast. (Incidentally, Norwich is an appropriate place to be brewing, because it holds the National Collection of Yeast Cultures). After a final little stir we put the lid on. Neil Star San-ned the airlock, then put a bit of vodka in it (his reasoning is, it’s better to have a bit of vodka falling in the beer than sanitiser). He popped airlock on top of the fermenting vessel, then put the vessel in his fermenting chamber (a big switched-off fridge with the shelves removed, with a heater and thermostat inside to keep it at a constant 20°C).
18. And that was that. 24 hours later, Neil sent me a video of the CO2 bubbling at short intervals through the vodka in the airlock as the beer started fermenting. He reported it smelled wonderfully fruity. It’s still fermenting now, and will go on doing so for about 10 days. We’re going to dry-hop this beer, which means adding more hops halfway through fermentation, to give that fresh hop flavour and aroma that’s so fashionable in beers these days. After fermentation, Neil will add isinglass finings (that’s the ones extracted from fish swim bladders), which will help clear the beer.
19. Once it’s fermented and cleared, Neil will syphon the beer into sterilised bottles, add ½ tsp sugar to each bottle so they can secondary-ferment in the bottle (then you get a bit of fizz, rather than a flat beer), and attach bottle tops. He’ll then leave them to secondary ferment and condition for a couple of weeks, and they’ll be ready to drink.
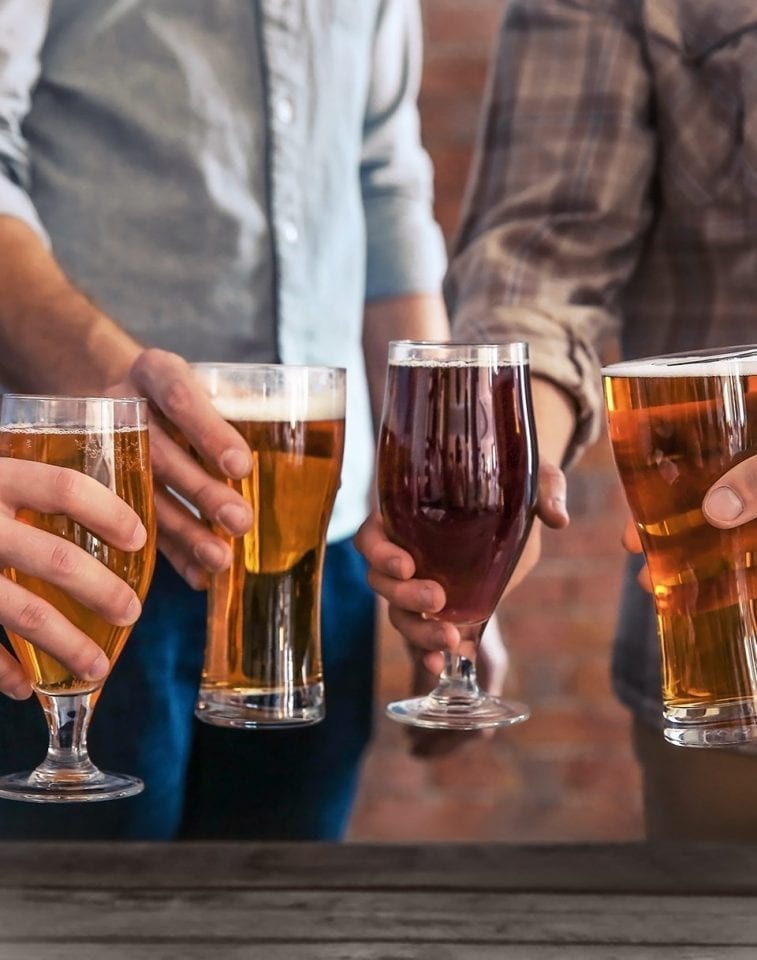
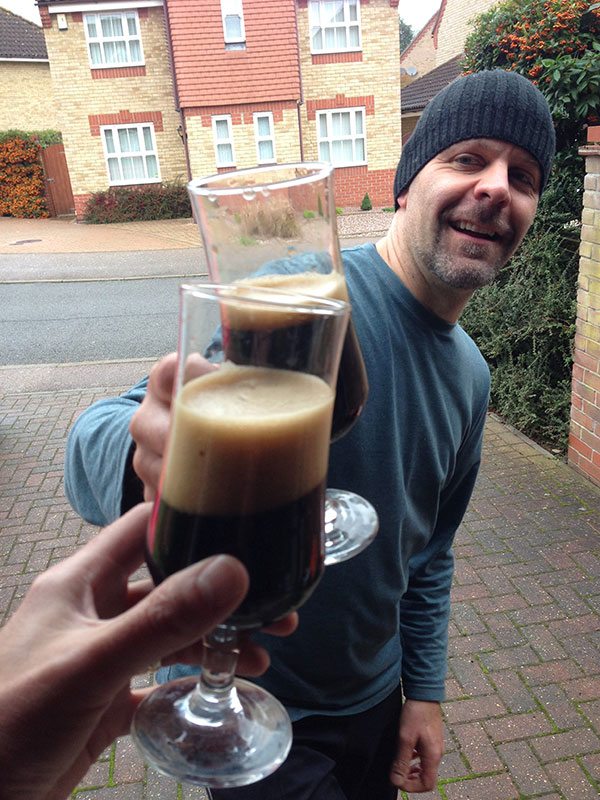
20. And that’s when I turn up in Norwich again, to drink some! (and do another brew, of course…) Here’s one Neil and I made back in June: a strong stout. Cheers!
Subscribe to our magazine
Food stories, skills and tested recipes, straight to your door… Enjoy 5 issues for just £5 with our special introductory offer
By joining our newsletter you agree to our
Privacy Policy
