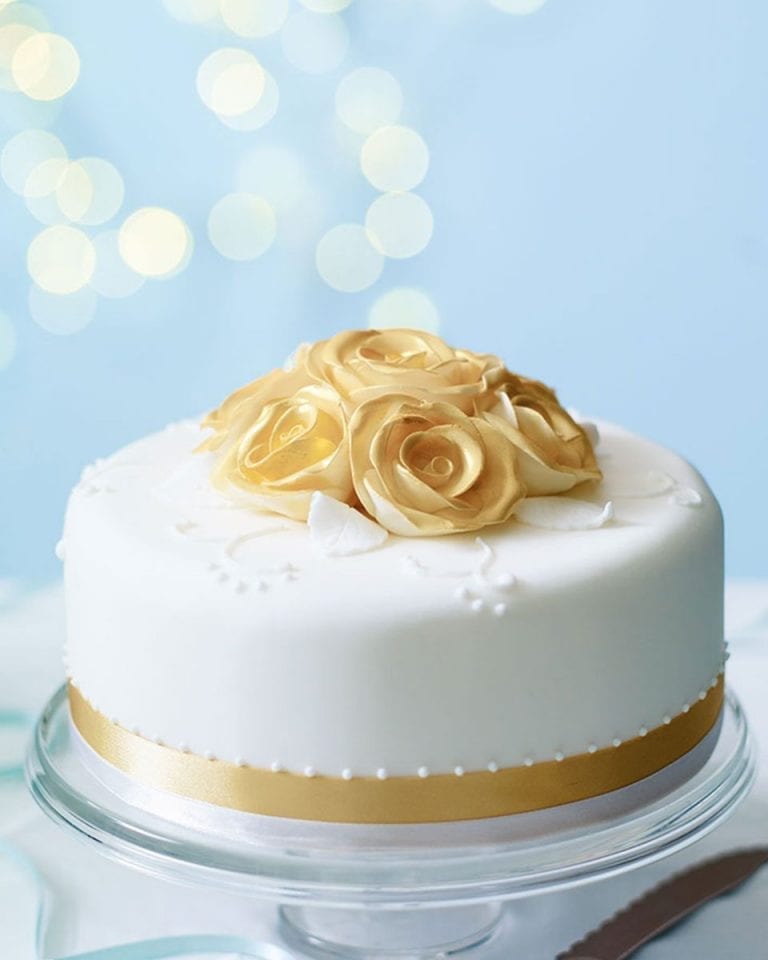
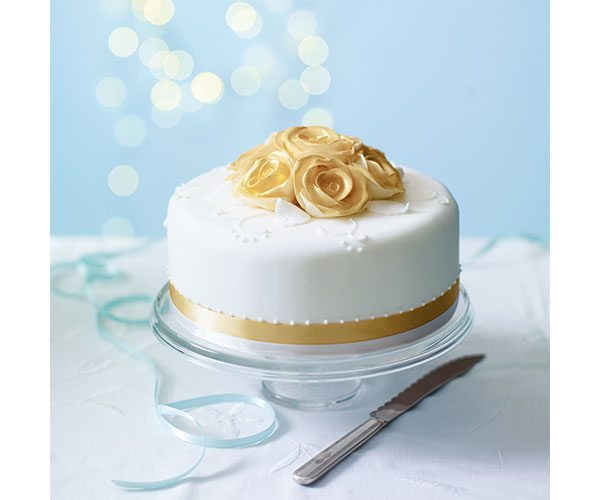
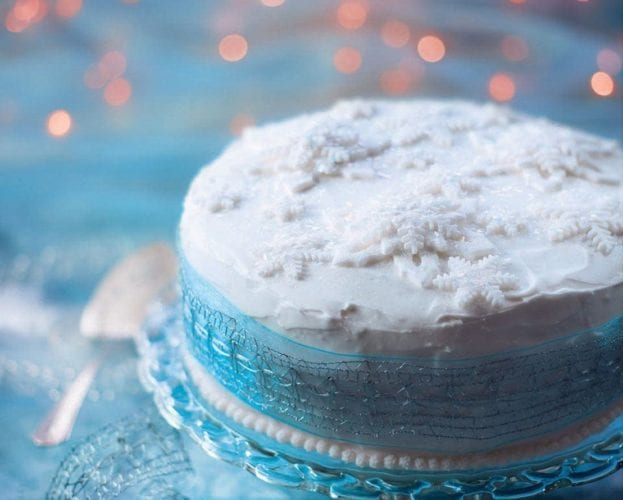
Adorn your Christmas cake with a hand-made golden rose cake topper using Juliet Sear’s simple step-by-step guide.
How to make a golden rose cake topper
Guides |
November 2016
Adorn your Christmas cake with a hand-made golden rose cake topper using Juliet Sear’s simple step-by-step guide.
You will need
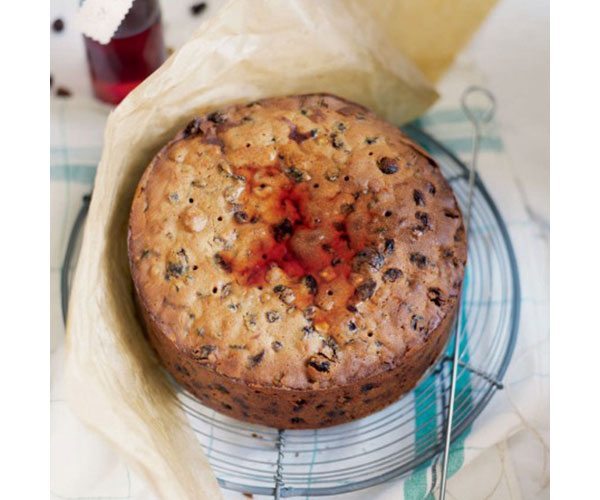
- 20cm homemade or good-quality shop-bought rich fruit cake covered with marzipan and icing
- Icing sugar to dust
- 500g white sugar paste
- Small, sharp knife
- A4 plastic document pocket, cut to open like a book
- Edible gold lustre spray
- Rose leaf plunger cutter
- 200g royal icing powder
- Piping bag with a number 2 nozzle (or cut a small – about 2mm – hole in the tip of a disposable piping bag)
- About 65cm x 15mm wide gold ribbon
- About 65cm x 7-10mm wide white ribbon
Use this recipe for sloe gin and walnut fruit cake and cover it with marzipan icing using this guide.
You can find cake and cookie supplies here.
To decorate a 20cm cake
Takes about 1 hour to ice, plus drying
Juliet’s tip: Make the sugar roses at least 24 hours before you plan to decorate your cake – you can make them weeks ahead if you wish, then store in an airtight cake box.
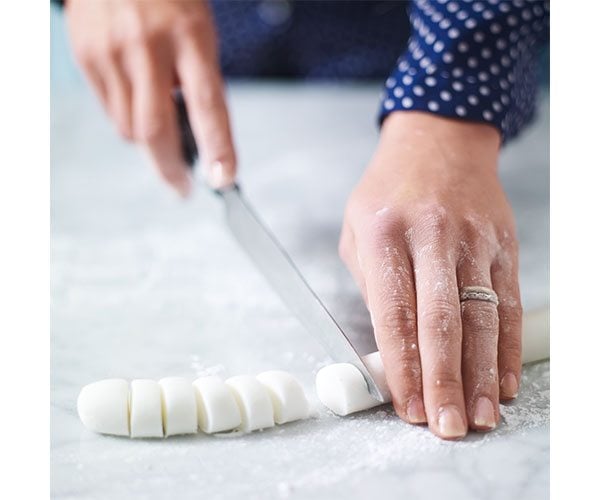
- Dust a clean work surface with a little icing sugar, then knead the sugar paste until soft (use the icing sugar sparingly if the paste is warm). Roll a handful into a 2cm thick sausage. With a sharp knife, slice into 9-12 discs about 1cm thick.

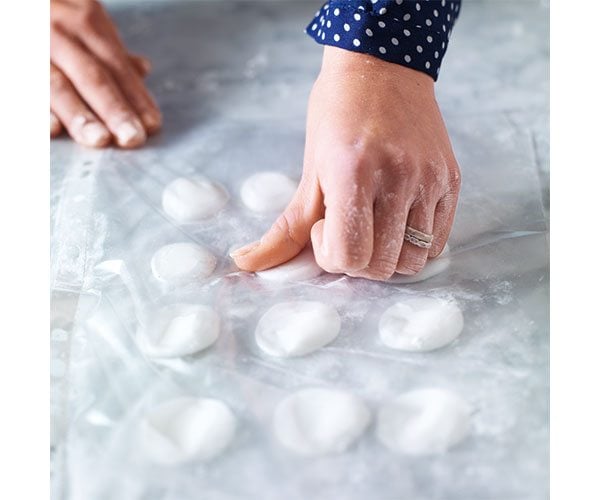
- Lay the document wallet open on the work surface, then lightly dust with icing sugar. Place the sugar paste discs on one half of the wallet, then close the other half over them. With the heel of your hand, gently push, flattening each disk so they’re 3-4mm thick.
- Use your thumb to gently push down on one side of each disc to form a thin edge. This will create a petal effect for the roses.
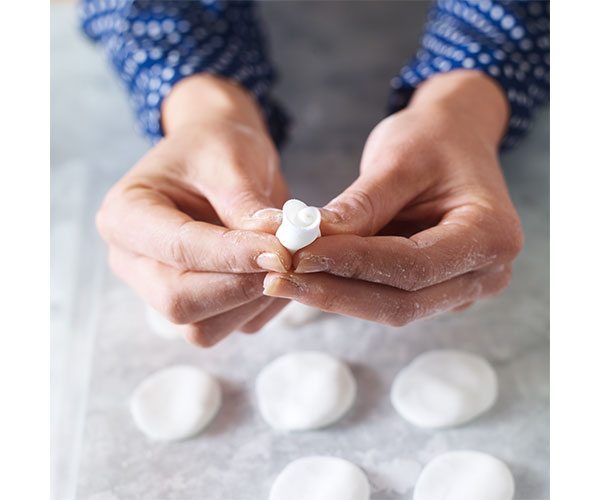
- Carefully peel back the top half of the plastic wallet. Very gently lift off one of the petals, holding it at the fat end so as not to damage the thin edge. The petal will curl out slightly. To make the rose centre, with the petal edges curling away from you, roll it into a tight cone, taking care not to touch the top, thin edge. Gently press the bottom to seal. This might take you a few attempts at first, but with a little practice you should soon end up with a tightly curled rose centre.
- Take a second petal and, with the thin end curling away from the rose centre, wrap it around to enclose the centre and form a bud – line up the middle of the second petal with the overlap of the centre, sitting it a fraction higher than the base of the rose centre. This will create the effect of the outer petals lifting up and outwards, like a rose in bloom. Gently press the bottom of the second petal, pinching it to the rose centre so they mould together at the base.
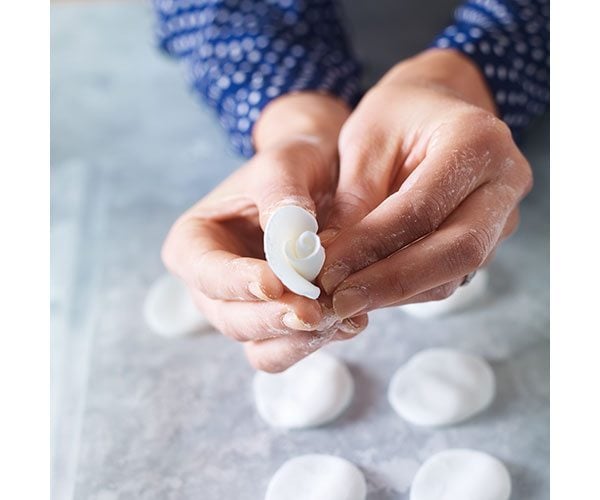
- Continue to overlay petals around the bud until you have a uniform round rose. It may take five, six or even seven petals to form your rose, depending on how big you would like it – don’t worry about it being perfect. Use a small sharp knife to slice off the chunky base of excess sugar paste, then set the rose aside on a cake board for at least 24 hours for the sugar paste to harden. Repeat steps 1-6 to create as many sugar roses as you would like to decorate your cake (I’ve used 7 roses here). Once the roses are firm, put them on a sheet of baking paper and spray them all over with gold lustre spray, then set aside to dry for 1 hour.
- Meanwhile, dust the work surface with icing sugar, then roll out a little more sugar paste to form a thin sheet that’s roughly the thickness of a 10p coin. Use a rose leaf cutter to stamp out 8-10 leaves. If you don’t have a cutter, you can use a small sharp knife to cut out the leaf shapes by hand, then use the tip of the knife to mark on the leaf veins.
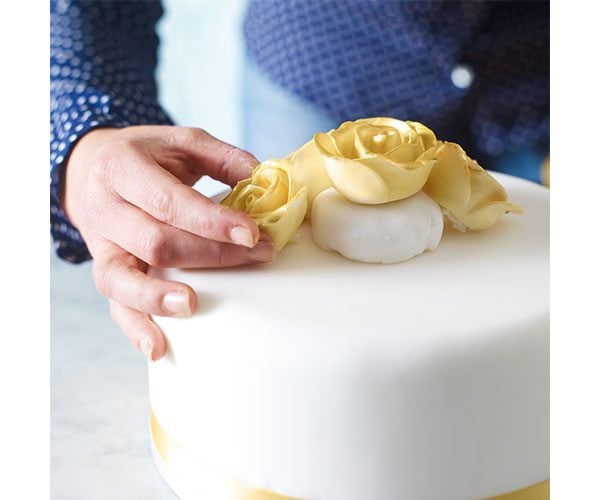
- Shape a handful of sugar paste into a rough ball. In a small bowl, mix the royal icing powder with enough water to create a soft peak consistency. Spoon the royal icing into a piping bag fixed with a number 2 nozzle, or with a 2mm hole snipped at the end. Squeeze a small amount of the royal icing onto the centre of the cake, then stick on the sugar paste ball to create a platform for the sugar roses. When the lustre has dried, pipe a little royal icing onto the base of one of the roses, then stick on top of the ball of sugar paste. Repeat with the remaining roses, arranging them around the base of the ball to conceal it. Lay the sugar leaves in-between the roses, fixing them in place with a little piped royal icing.
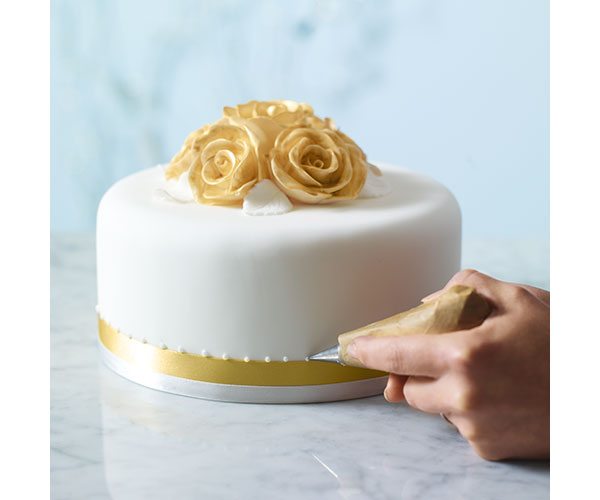
- Wrap a length of gold ribbon around the base of the cake and glue the overlap with a little piped royal icing. Overlay with a length of the narrow white ribbon, fixing with another dab of icing. Pipe evenly spaced dots along the top of the gold ribbon.
- To finish, pipe a swirly pattern on the top of the cake. Don’t be scared – just let your imagination go, or you can copy the design used here. Practise on the work surface first if you haven’t used royal icing before, to get the feel for it. Let the icing dry for 1 hour before serving the cake.


Subscribe to our magazine
Food stories, skills and tested recipes, straight to your door… Enjoy 5 issues for just £5 with our special introductory offer
By joining our newsletter you agree to our
Privacy Policy
