HomeFeaturesHow to make homemade pizza from scratch: a complete guide
How to make homemade pizza from scratch: a complete guide
If you’re planning a pizza party with friends, want to rustle up some DIY pizzas with the kids or simply have an unwavering craving for stuffed-crust that you can’t seem to shift, our ultimate guide to making homemade pizza is here to save the day.
We’ve got a super simple pizza dough recipe that doesn’t take long to prepare. We’ve got the frying pan pizza method that will result in pizza of your dreams, too. And we have the recipe for the pizza sauce, so you can easily find everything you need right here. Once you’ve created your pizza base to rival all others, dive head-first into our collection of pizza recipes for ideas on toppings from veggie delights, to simple classics and a Hawaiian creation (we’re pro pineapple on pizza).
adslot-article-1
What to know before you get started
There are as many ways to make pizza dough as there are combinations of toppings – but the ingredients themselves are simple. Flour, water, yeast and salt are your must-haves, although a little sugar (to help the yeast along) and olive oil (because everything is better with olive oil) can’t hurt. It’s the dough that usually dictates the style of pizza, from the thinner Neapolitan with its leopard- spotted charred crusts, to the doughy, thick, deep-dish pizza ‘pies’ associated with Chicago.
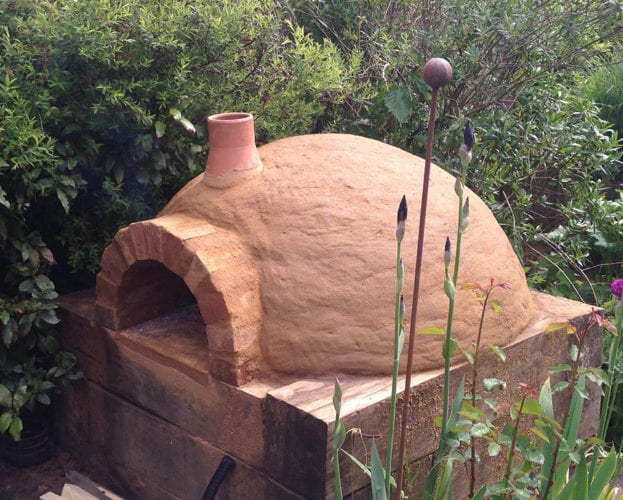
Without a proper pizza oven, Neapolitan-style crusts are tough to achieve – the ferocious heat needed to puff up the dough in a minute or
two can’t be provided by conventional ovens. Instead, aim for what’s generally known as a New York-style crust: a little thicker, crunchier and sturdier, but still with that chewy pull when you bite into it.
Remember to keep the yeast and salt separate at the beginning of the dough process. Salt inhibits yeast’s ability to multiply so it’s best to add the salt when the yeast has been given time to get going in the tepid water. Let the liquid and flour get to know each other too; waiting 15 minutes after bringing them together allows the flour to fully hydrate (a process known as autolysis), which strengthens and smooths the dough as gluten bonds begin forming. Some bakers – especially with bread – autolyse their dough for up to an hour, but we’ve found 15 minutes is plenty for pizza.
Knocking back the dough releases the large air bubbles that develop when it’s proving. Dust your hands with flour, then push the dough down into the bowl before giving it a quick knead.
The frying pan pizza method
Baking pizza – even at the highest temperature a conventional oven will go to – will certainly do the job, but the length of time needed to cook the dough means you’re left with a crunchy, almost biscuit-like base and toppings that taste flat and dry rather than charred and molten. The answer is not to use your oven at all, replacing it with a red-hot frying pan and grill instead.
Throwing the dough into a pan on the hob will ensure the base of your pizza instantly crisps and helps to bubble up the crust. Quickly transferring it to a hot grill simulates the über-heat of a pizza oven, resulting in a lightly charred border and bubbling but still gooey cheese. This method is the real key to creating pizza that’s a cut about those baked in a regular oven. The exact time your dough will need on the hob and under the grill will depend on your pan, thickness of dough, amount of toppings and how hot you can get things – so use your instincts.
How to make perfect pizza dough
We’ve kept the method simple with a three-step process that can be done in a day. A stand mixer with a dough hook makes life easier, but you can of course knead by hand on a lightly floured work surface – just expect to be there for a good 10-15 minutes before the dough is springy and elastic.
Makes: 4 x 25cm pizza bases
Takes 45 minutes to make, 5 minutes to cook, plus 3 hours rising/proving
Ingredients:
470g strong white bread flour
300g tepid water
7.5g fresh yeast (see Know-how), or 1 tsp fast-action dried yeast
2 tsp salt
1 tsp sugar
Extra-virgin olive oil to drizzle
Method:
Crumble the yeast into the tepid water, then add the sugar and a drizzle of olive oil. Mix well, then leave for 5 minutes to activate the yeast.
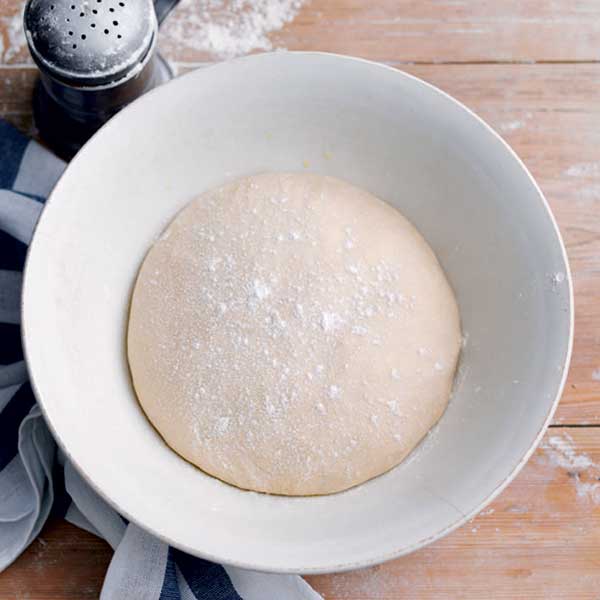
Add the flour to a large bowl. Pour in the yeast mixture, then mix with a spoon and then your hands until the mixture comes together. Leave for 15 minutes to allow the flour to hydrate and the gluten to strengthen, then add the salt. Knead the dough for 10-15 minutes until it comes away from the sides of the bowl and is springy, elastic and tacky.
Turn the dough out onto a lightly floured work surface and shape into a rough rectangle. Fold the top edge over itself, followed by the left edge, then the right, then the bottom. Grease your mixing bowl with a little olive oil, then transfer the dough seam-side down to the bowl. Cover and leave in a warm place for 1 hour to rise.
After an hour, turn out the dough, repeat the folding technique in step 3, then return to the bowl, cover and leave for a further hour.
Turn out the dough, knock it back (knead very briefly to get rid of any large air bubbles) and divide into 4. Pick up each piece and use your hands to stretch it into a taut ball, taking the edges and tucking them underneath, leaving the seam side touching the work surface. Drizzle the dough with oil, loosely cover with a clean tea towel and leave to prove for a final hour.
Now it’s time to assemble the pizzas. Turn the grill to high and put the ovenproof frying pan over a high heat on the hob. Start stretching out a portion of dough until it’s the same size as your pan. Try to keep the edges slightly thicker than the centre.
Carefully but confidently transfer your dough into the hot frying pan. Spread 1 heaped tbsp of sauce evenly across the dough, then add your chosen toppings (remember: less is more). Cook for 3-4 minutes – you should see the base start to puff up and the dough dry out.
Transfer the pan to the grill, as close to the heat as you can, and cook for 4-6 minutes or until the crusts are blistered and the cheese is bubbling and golden. Add any final toppings, leave to rest for 5 minutes, then slice and serve. Repeat with the remaining pizzas. The pizzas are best served straightaway, but if you want to serve them all at once you can keep them warm on the bottom shelf of the oven, with the grill on above.
How to freeze pizza dough: You can freeze the dough after dividing it up (step 5). Wrap in cling film and foil, then store in the freezer for up to 1 month. Defrost at room temperature and continue with the recipe.
For the full recipe and nutritional information, click here.
Tip: If you don’t have an oven-proof frying pan, put a baking sheet under the grill and carefully slide the fried pizza onto the sheet.
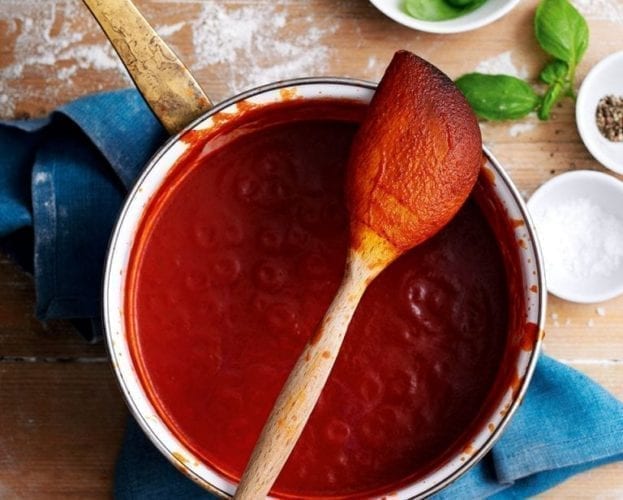
How to make the ultimate pizza sauce
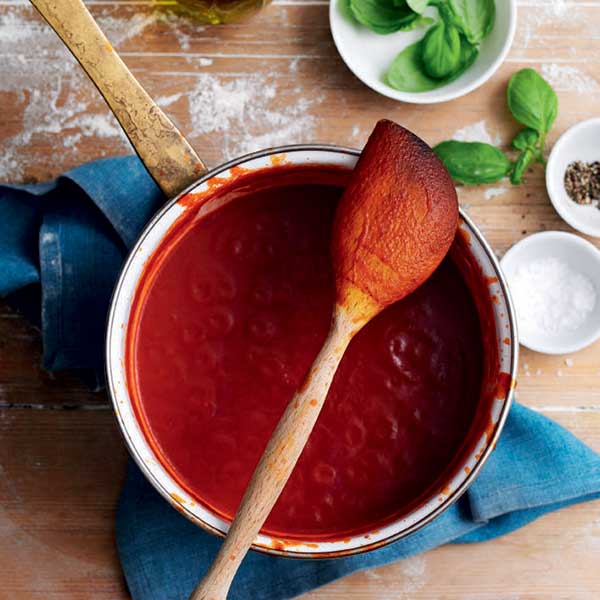
Unless you’re making a white pizza, the tomato sauce is a key component and provides a rich, sweet base for the cheese and other toppings to sit on. Traditional Neapolitan pizzaiolos just add a spoonful of uncooked puréed tomatoes, which cooks in seconds in a fierce pizza oven, but without that ferocious heat the sauce can make the pizza soggy. The answer for conventional oven owners is to slow-cook a tin of tomatoes to get rid of as much of the water as possible, resulting in a jammy, intense, spreadable sauce that won’t interfere with the dough below.
Although a tin of standard tomatoes works perfectly well, it’s a no-brainer to infuse the sauce with quintessential Italian flavours as it simmers: garlic, basil and a generous glug of olive oil. Gently sizzling very roughly chopped garlic cloves (as opposed to finely chopped) means they’re less likely to burn and give the sauce an acrid taste, and while basil is usually added at the last minute in cooking, the stalky bits can be used at the beginning to add a stronger, grassier flavour.
Makes enough for 4 pizzas with leftovers
Takes 5 minutes to make, 30 minutes to cook
Ingredients:
2 tbsp extra-virgin olive oil
4 garlic cloves, roughly chopped
400g tin best-quality tinned tomatoes (ideally san marzano or datterini)
Bunch basil, roughly chopped, reserving a small handful leaves to garnish (optional)
Method:
Put the oil and garlic in a small saucepan over a medium heat. Bring to a sizzle and cook the garlic for 2 minutes, stirring occasionally, then add the basil and sizzle for a further minute. Tip in the tomatoes, crushing them with a fork as you go, then season with a pinch of salt. Leave to simmer very gently (uncovered) for about 30 minutes until jammy, then whizz with a stick blender or in a jug blender and leave to cool.
The sauce will keep in the fridge, covered, for 3-4 days or can be frozen for up to 1 month.
For the full recipe and nutritional information, click here.
Choose your toppings…
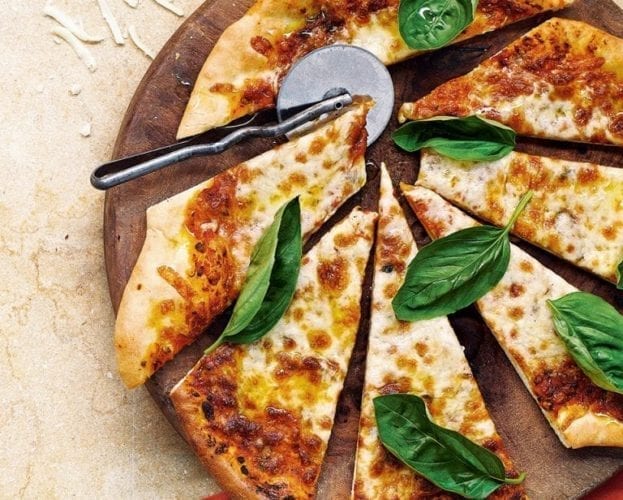
We’re not going to tell you what to put on your pizza. If ham and pineapple, barbecue sauce or – admittedly this does make us shudder a little – tinned tuna floats your boat, go for it. The key is to think about the balance of flavours and to not overload the dough. Margherita is a classic for a reason – the salty, creamy cheese contrasts with the fruity, slightly tart tomato sauce. Anchovies and olives add complex, salty savouriness; capers and pickled jalapeños add extra tang. Try to get a mix of salty, tangy, fresh and sweet for a pizza that does it all.
Find the courage to be restrained. An excess of toppings will result in something too rich, which doesn’t crisp up properly in the middle. The best pizzas have just a scattering of cheese and a sprinkle of toppings, so the dough cooks properly and the sauce can shine through.
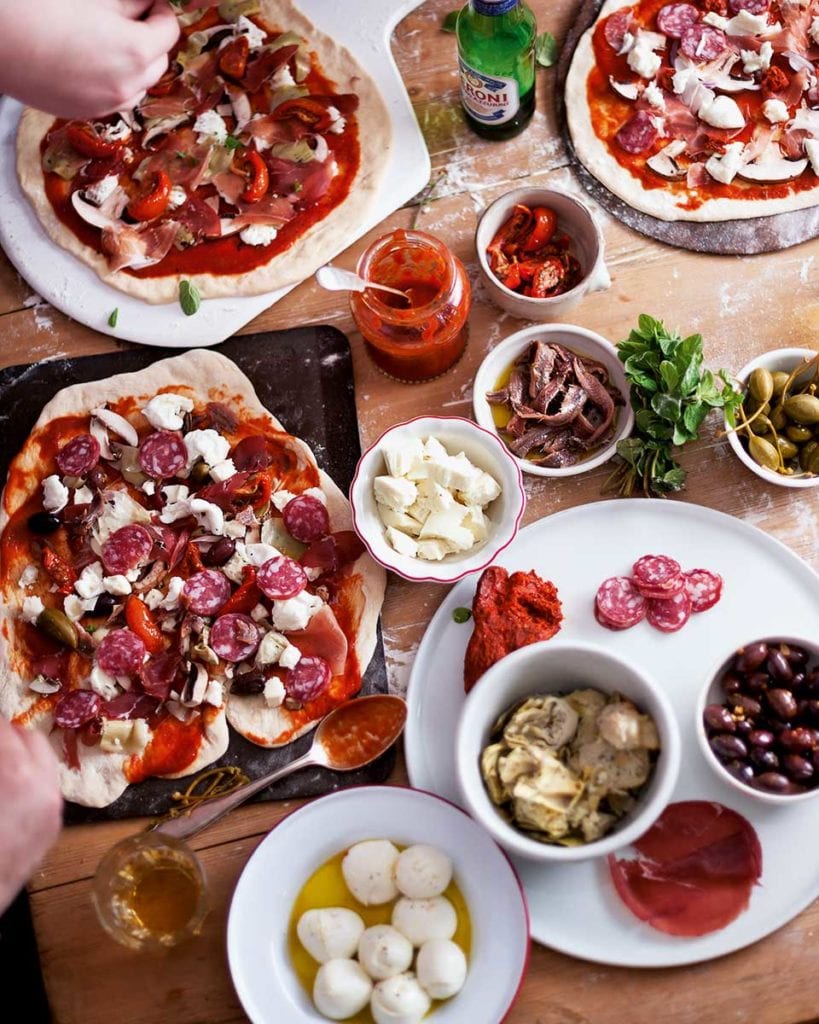
Cheese
Mozzarella is the obvious choice, but not all mozzarellas are made equal. The ones you buy in bags full of watery whey are great, but you need to squeeze them in kitchen paper to remove as much liquid as possible, saving your dough from turning soggy. For the initial coverage, we like using the firmer, dry mozzarella that comes already grated or in a block ready to be sliced. We then pinch off little pieces of ball mozzarella to dot on the pizza when it comes out of the oven (the residual heat will be enough to melt it).
There’s no reason why you can’t mix the cheese up too. Use a combo of whatever you have in the fridge (although avoid cheddar as it can be too oily). As a general guide: opt for anything that goes stringy once melted, including Jarlsberg, Edam or Emmental. A sprinkling of parmesan, pecorino or grana padano adds an extra salty kick, too.
Veggie toppings
If you’ve got a crowd round, it’s always fun to serve up different veggies in bowls and let guests pick their favourites. Vegetables such as mushrooms and onions benefit from a quick fry beforehand, allowing them to lose their moisture so they caramelise and sweeten in the final blast of heat. Sliced peppers, artichokes and olives all work well. If you’re stuck for inspiration, give this pizza bianca with goat’s cheese, courgette and olives a go. Basil leaves, black pepper and a final drizzle of olive oil are best added after the pizza is cooked, there will be plenty of residual heat to help release their flavour.
Meat toppings
For those who prefer to add meat to their pizza, scatter a selection of cooked cold meats or shredded chicken on top, after you’ve added the cheese. Our rocket and pancetta pizza is the ultimate meat-lover’s dream.
But why take our word for it? Choose your own toppings and take a look at our 53 pizza recipes.
 Makes enough for 4 pizzas with leftovers