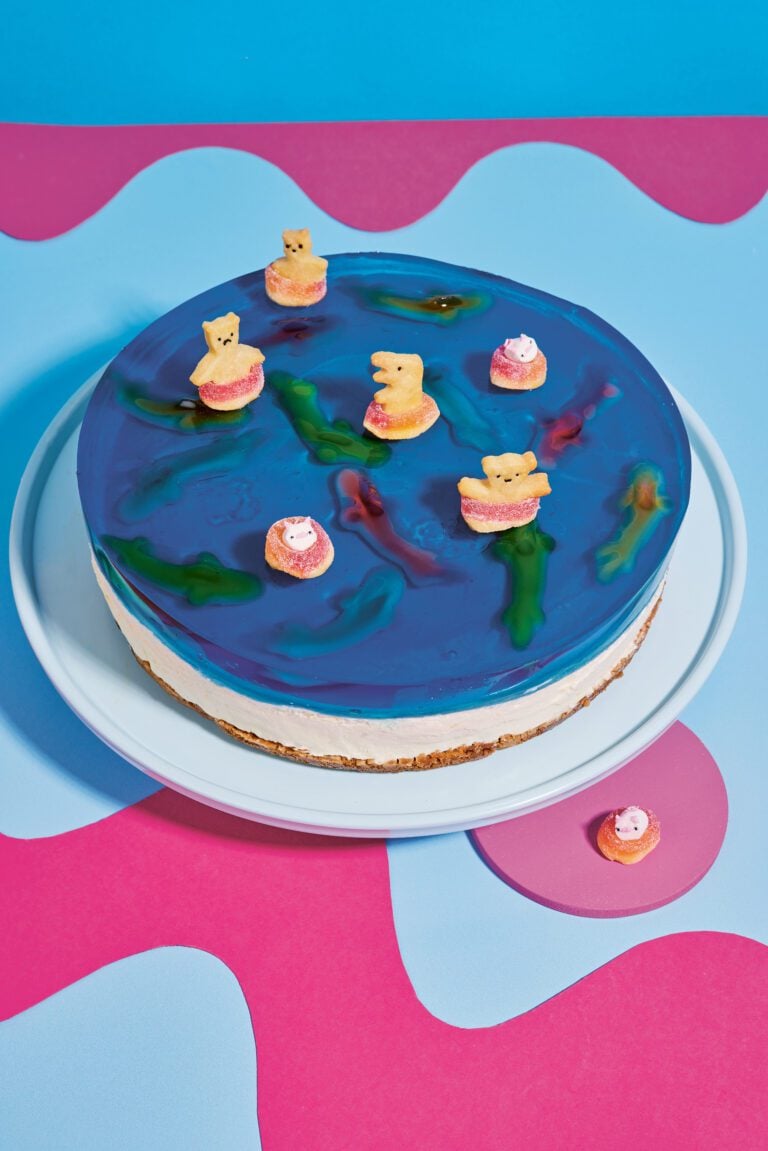
“This no-bake cheesecake is so straightforward to make – just whizz (or bash!) the biscuit base and press it in, then mix together the cheesecake layer and put it on top. There’s no baking involved. The only slightly tricky bit is the jelly, but as long as you seal any gaps and go slowly, all will be fine. This cheesecake is as delicious as it is charming.” Kim-Joy
Loved this playful pud? Try Kim-Joy’s baked blueberry escapee cheesecake, too.

Join Extradelicious to unlock Cook Mode
Ingredients
For the base
- 140g unsalted butter, melted, plus extra for greasing
- 260g biscuits (digestives/Biscoff/graham crackers or use gluten-free digestives or graham crackers)
- 30g caster or granulated sugar
For the cheesecake layer
- 900g full-fat cream cheese
- 100ml soured cream
- Finely grated zest of 1 lemon, plus 1 tbsp lemon juice
- 120g icing sugar
- 1 tbsp vanilla bean paste or extract 100ml double cream
For the jelly layer
- 2 x 85g (3oz) packs blue jelly crystals or 2 x 135g packs jelly cubes
- 400ml boiling water
- Blue food dye (optional)
To decorate
- Jelly-sweet sharks and fish
- Other sweets, sprinkles and animal biscuits to decorate
Specialist kit
- 23cm springform cake tin
- Food-grade acetate
Join Extradelicious to unlock Cook Mode
Method
- Grease the base and sides of the cake tin with butter. Detach the sides from the base, then line the base with a large piece of baking paper that extends beyond the sides. Attach the sides so that the baking paper now extends outside of the tin – this will make it easier to remove the base later. Use the food-grade acetate to line the inside circumference of the tin, using tape or pins to connect the ends. The acetate is extra insurance to make sure the jelly doesn’t leak through!
- To make the base, use a food processor to whizz the biscuits into fine crumbs or put them inside a sealed plastic bag and crush with a rolling pin. It’s easiest to do this in small batches.
- Add the crumbs, melted butter and sugar to a mixing bowl. Mix until all the crumbs are evenly coated and resemble fine sand. Tip the mixture into the prepared tin. Use something with a flat base and straight sides (like a measuring cup) to firmly pack the crumbs over the base in a roughly even layer. Put in the freezer to chill.
- While the base chills, make the filling. Add the cream cheese, sour cream, lemon zest and juice, icing sugar and vanilla to a large mixing bowl. Mix until smooth. It helps to use a spatula to break up the cream cheese first, and then use a balloon whisk. If using a stand mixer, use the paddle attachment and mix for around a minute. You can also use a handheld electric whisk – just avoid mixing for too long and introducing air.
- In a separate bowl, whisk the double cream until it reaches soft peaks. Fold it into the cream cheese mixture until just combined, then pour the mixture over the frozen biscuit base, making sure it touches the edges of the acetate. Cover with plastic wrap and chill in the fridge for at least 2 hours, or overnight.
- Once the cheesecake layer is chilled, make the jelly layer. Put the crystals/jelly cubes in a bowl and add the boiling water. Stir to dissolve. Add 300ml cold water and stir again. This will generally be less water than the packet instructions suggest, but will help make a firmer jelly. Add blue food dye if needed. Let the jelly cool a bit (see Kim Joy’s Tips).
- Pour a small amount of jelly mixture over the chilled cheesecake to form a thin layer, then immediately put the cheesecake in the fridge (see Kim Joy’s Tips). Keep the remaining jelly at room temperature, ready to pour later.
- Once the first, thin layer of jelly is set, arrange the jelly sharks or fish on top of it. Then pour over the remaining jelly to completely cover the existing layer. Put in the fridge and leave to set for at least 6 hours.
- Once set, remove the springform tin, then peel off the acetate. If the jelly has set completely, it should come off easily. Slide a cake lifter (or similar wide palette knife) between the biscuit layer and the baking paper, then carefully transfer to a serving plate. Decorate the top with sweets, sprinkles and animal biscuits, then it’s ready to serve.
Nutrition
- 654kcals Calories
- 47g (27g saturated) Fat
- 6.2g Protein
- 51g (40g sugars) Carbs
- 2g Fibre
- 1.2g Salt


Leave a comment, question or tip